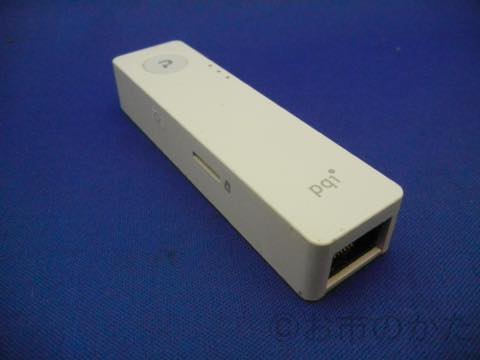
PQI Air PenにKernelモジュール追加
次の記事の通り、PQI Air Pen用に、クロスコンパイル環境を構築できました。
- PQI Air Pen用にUbuntu 12.04でmipsのクロスコンパイル環境設定: プラスα空間 (2014年1月24日)
この目的は、PQI Air Penに、Kernelモジュールを追加したかったからです。
[amazonjs asin="B00BNAST0O" locale="JP"]
このあと試行錯誤して、Kernelモジュールを組み込む事ができました。ただ、完全な成功ではなく、「組み込めた」だけです。Kernelモジュールが正しく動いているかどうかは不明です。
次の手順で、Kernelモジュールの組み込み実験をしました。
- Ubuntu 12.04にncurses追加
- Linux Kernel 2.6.31のソースの展開
- Kernelコンフィグレーション
- Kernelソースにパッチ
- 標準Kernelモジュールビルド
- Hello World! Kernelモジュールビルド
- PQI Air Penに組み込み
順を追って説明します。
1. Ubuntu 12.04にncurses追加
クロスコンパイル環境として、Ubuntu 12.04を使っています。Kernelをビルドする前に、コンフィグレーションが必要です。このコンフィグレーションをGUI的にやろうとすると、"ncurses-devel"が必要の様です。Ubuntuの場合、パッケージ名が違っています。次の手順でインストールします。
$ sudo apt-get install libncurses5-dev
次のページで知りました。Thank you!
2. Linux Kernel 2.6.31のソースの展開
次のウェブページから、Kernel 2.6.31のソースをダウンロードします。
$ wget https://www.kernel.org/pub/linux/kernel/v2.6/linux-2.6.31.tar.bz2
ダウンロードしたら、展開します。
$ tar xvjf linux-2.6.31.tar.bz2
3. Kernelコンフィグレーション
Kernelのコフィグレーションは、次のコマンドで実行します。
$ make ARCH=mips CROSS_COMPILE=mips-linux-gnu- menuconfig
設定し終わったら、最後に".config"に保存して終了します。
最終的にたどり着いた、CPU周りの設定は次の通りです。
CONFIG_NXP_STB220=y
CONFIG_CPU_BIG_ENDIAN=y
CONFIG_CPU_MIPS32_R2=y
CONFIG_SYS_HAS_CPU_MIPS32_R2=y
CONFIG_CPU_SUPPORTS_32BIT_KERNEL=y
CONFIG_CPU_MIPSR2_IRQ_VI=y
他、デバイスドライバなどのコンパイルオプションの設定があります。私は、USBとネットワーク以外のすべてのデバイスドライバを非選択にしました。
デバイスドライバの中には、上記の設定だとコンパイルエラーになる物がありますので、コンパイルエラーにならない物だけ残したと言う感じです。
4. Kernelソースにパッチ
Kernelモジュールを組み込むためには、vermagicが一致している必要があります。次のページを参考にさせていただきました。ありがとうございます。
linux-2.6.31.test1と言うディレクトリが、実際に作業したディレクトリです。名前を変更しています。
$ diff -c linux-2.6.31/include/linux/vermagic.h linux-2.6.31.test1/include/linux/vermagic.h
*** linux-2.6.31/include/linux/vermagic.h	2009-09-10 07:13:59.000000000 +0900
--- linux-2.6.31.test1/include/linux/vermagic.h	2014-01-26 22:08:24.128000000 +0900
***************
*** 27,34 ****
  #endif

  #define VERMAGIC_STRING 						\
! 	UTS_RELEASE " "							\
  	MODULE_VERMAGIC_SMP MODULE_VERMAGIC_PREEMPT 			\
! 	MODULE_VERMAGIC_MODULE_UNLOAD MODULE_VERMAGIC_MODVERSIONS	\
! 	MODULE_ARCH_VERMAGIC

--- 27,34 ----
  #endif

  #define VERMAGIC_STRING 						\
! 	UTS_RELEASE ".AirPen_V0.1.22-g5eca71a "							\
  	MODULE_VERMAGIC_SMP MODULE_VERMAGIC_PREEMPT 			\
! 	MODULE_VERMAGIC_MODULE_UNLOAD 	\
! 	MODULE_ARCH_VERMAGIC
それと、oprofilefs.cで、コンパイルエラーになるので、Makefileを修正しました。
$ diff -c linux-2.6.31/arch/mips/oprofile/Makefile linux-2.6.31.test1/arch/mips/oprofile/Makefile
*** linux-2.6.31/arch/mips/oprofile/Makefile	2009-09-10 07:13:59.000000000 +0900
--- linux-2.6.31.test1/arch/mips/oprofile/Makefile	2014-01-25 21:37:27.188767000 +0900
***************
*** 1,4 ****
! EXTRA_CFLAGS := -Werror

  obj-$(CONFIG_OPROFILE) += oprofile.o

--- 1,4 ----
! #EXTRA_CFLAGS := -Werror

  obj-$(CONFIG_OPROFILE) += oprofile.o
この設定をしないと、次のエラーになります。
  CC [M]  arch/mips/oprofile/../../../drivers/oprofile/oprofilefs.o
In file included from arch/mips/oprofile/../../../drivers/oprofile/oprofilefs.c:17:0:
include/linux/pagemap.h: In function 'fault_in_pages_readable':
include/linux/pagemap.h:413:16: error: variable 'c' set but not used [-Werror=unused-but-set-variable]
  volatile char c;
                ^
cc1: all warnings being treated as errors
make[1]: *** [arch/mips/oprofile/../../../drivers/oprofile/oprofilefs.o] Error 1
make: *** [arch/mips/oprofile] Error 2
5. 標準Kernelモジュールビルド
この修正が終わったら、いよいよモジュールのビルド(コンパイル)になります。
$ make ARCH=mips CROSS_COMPILE=mips-linux-gnu- modules
これで、エラーが無くなるまで環境を見直します。
6. Hello World! Kernelモジュールビルド
独自ドライバとして、Hello World! Kernelモジュールを組み込んでみます。
次のページの通りにビルドしてみました。
hello.cのライセンスは"Dual BSD/GPL"となっていますので、そのまま掲載させていただきます。
#include <linux/init.h>
#include <linux/module.h>
MODULE_LICENSE("Dual BSD/GPL");

static int hello_init(void)
{
  printk(KERN_ALERT "Hello, World\n");
  return 0;
}

static void hello_exit(void)
{
  printk(KERN_ALERT "Goodbye, World\n");
}

module_init(hello_init);
module_exit(hello_exit);
Makefileは次の通りです。Kernelモジュールをビルドするだけだったら、1行で構いません。
obj-m := hello.o
これらの準備が終わったら、ビルドします。
$ ls
hello.c   linux-2.6.31.test1  Makefile
$ make ARCH=mips CROSS_COMPILE=mips-linux-gnu- -C $PWD/linux-2.6.31.test1 M=$PWD modules
$ ls
hello.c   hello.mod.c  hello.o             Makefile        modules.order
hello.ko  hello.mod.o  linux-2.6.31.test1  Module.markers  Module.symvers
“hello.ko"ができました。
出来上がったhello.koのfile情報は、次の通りです。
$ file hello.ko
hello.ko: ELF 32-bit MSB relocatable, MIPS, MIPS32 rel2 version 1 (SYSV), BuildID[sha1]=0xbb912c16c1e8619c20dd1dfd1c31c555ab497a58, with unknown capability 0x41000000 = 0xf676e75, with unknown capability 0x10000 = 0x70403, not stripped
7. PQI Air Penに組み込み
出来上がったhello.koを、microSDカードにコピーします。トップディレクトリに置いたと仮定します。
% telnet 192.168.200.1
Trying 192.168.200.1...
Connected to 192.168.200.1.
Escape character is '^]'.
(none) login: root
Password: pqiap

BusyBox v1.01 (2013.01.03-08:27+0000) Built-in shell (ash)
Enter 'help' for a list of built-in commands.

~ # cd /tmp/www/ftp/sda1/
/tmp/www/ftp/sda1 # ls
Photo             dcim              hello.ko          Music             Video
/tmp/www/ftp/sda1 # lsmod
Module                  Size  Used by    Tainted: P
umac 576480 0 - Live 0xc02b6000
ath_dev 207072 1 umac, Live 0xc01c3000 (P)
ath_rate_atheros 20032 1 ath_dev, Live 0xc0174000 (P)
ath_hal 371936 2 umac,ath_dev, Live 0xc010b000 (P)
adf 9904 3 umac,ath_dev,ath_hal, Live 0xc0096000
asf 6816 3 umac,ath_dev,ath_hal, Live 0xc0089000 (P)
athrs_gmac 49616 0 - Live 0xc0072000
usb_storage 38400 1 - Live 0xc003e000
ehci_hcd 32928 0 - Live 0xc001d000
hello.koを組み込んでいます。
/tmp/www/ftp/sda1 # insmod hello.ko
/tmp/www/ftp/sda1 # lsmod
Module                  Size  Used by    Tainted: P
hello 1376 0 - Live 0xc03a2000
umac 576480 0 - Live 0xc02b6000
ath_dev 207072 1 umac, Live 0xc01c3000 (P)
ath_rate_atheros 20032 1 ath_dev, Live 0xc0174000 (P)
ath_hal 371936 2 umac,ath_dev, Live 0xc010b000 (P)
adf 9904 3 umac,ath_dev,ath_hal, Live 0xc0096000
asf 6816 3 umac,ath_dev,ath_hal, Live 0xc0089000 (P)
athrs_gmac 49616 0 - Live 0xc0072000
usb_storage 38400 1 - Live 0xc003e000
ehci_hcd 32928 0 - Live 0xc001d000
組み込まれました! うまく行けば、dmesgにメッセージが出力されるはずです。
/tmp/www/ftp/sda1 # dmesg | tail
device ath0 entered promiscuous mode
br0: port 1(ath0) entering learning state
 ieee80211_ioctl_siwmode: imr.ifm_active=393856, new mode=3, valid=1
br0: port 1(ath0) entering disabled state
 DEVICE IS DOWN ifname=ath0
 DEVICE IS DOWN ifname=ath0
br0: port 1(ath0) entering learning state
br0: port 1(ath0) entering forwarding state
warning: `vsftpd' uses 32-bit capabilities (legacy support in use)
Algorithmics/MIPS FPU Emulator v1.5
“Hello, World"が表示されるはずなのですが、ありません。念のため、/proc/kmsgも確認しましたが、やはり何もありませんでした。
今度は、組み込んだKernelモジュールを外してみます。
/tmp/www/ftp/sda1 # rmmod hello.ko
/tmp/www/ftp/sda1 # lsmod
Module                  Size  Used by    Tainted: P
umac 576480 0 - Live 0xc02b6000
ath_dev 207072 1 umac, Live 0xc01c3000 (P)
ath_rate_atheros 20032 1 ath_dev, Live 0xc0174000 (P)
ath_hal 371936 2 umac,ath_dev, Live 0xc010b000 (P)
adf 9904 3 umac,ath_dev,ath_hal, Live 0xc0096000
asf 6816 3 umac,ath_dev,ath_hal, Live 0xc0089000 (P)
athrs_gmac 49616 0 - Live 0xc0072000
usb_storage 38400 1 - Live 0xc003e000
ehci_hcd 32928 0 - Live 0xc001d000
外れました。dmesgを確認してみました。
/tmp/www/ftp/sda1 # dmesg | tail
device ath0 entered promiscuous mode
br0: port 1(ath0) entering learning state
 ieee80211_ioctl_siwmode: imr.ifm_active=393856, new mode=3, valid=1
br0: port 1(ath0) entering disabled state
 DEVICE IS DOWN ifname=ath0
 DEVICE IS DOWN ifname=ath0
br0: port 1(ath0) entering learning state
br0: port 1(ath0) entering forwarding state
warning: `vsftpd' uses 32-bit capabilities (legacy support in use)
Algorithmics/MIPS FPU Emulator v1.5
本当は、"Goodbye, World"と表示されるはずですが、何もありません。
Kernelモジュールとして組み込む事はできましたが、動作しているのかどうか、不明です。


ディスカッション
コメント一覧
まだ、コメントがありません